This guide explains how to define walls or obstacles and create navigable paths using Wallpoints and Waypoints.
How to set up walkable areas
Mark obstacles (define walls)
Walls are places that a user cannot navigate through, meaning a blockage on the way. They help guiding the user through available paths, and ensure to not take the user through walls, obstacles or restricted areas.
In order to define walls or obstacles on aryve Studio, you can switch to the Waypoint View editor.
-
Switch to the Waypoint View from the top panel.
-
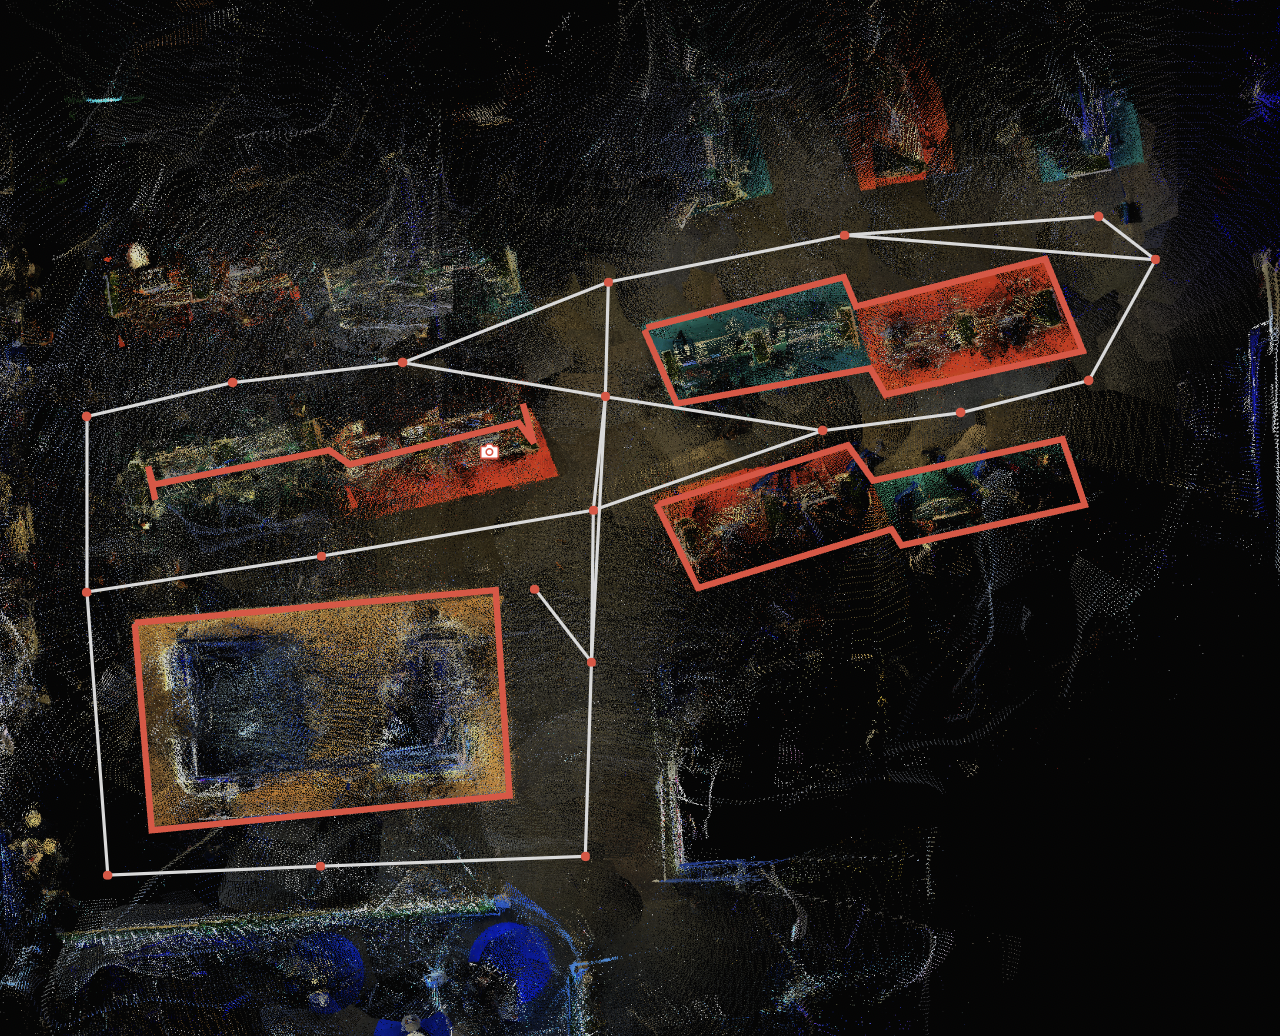
You'll see the scanned floorplan from a top-down perspective.
-
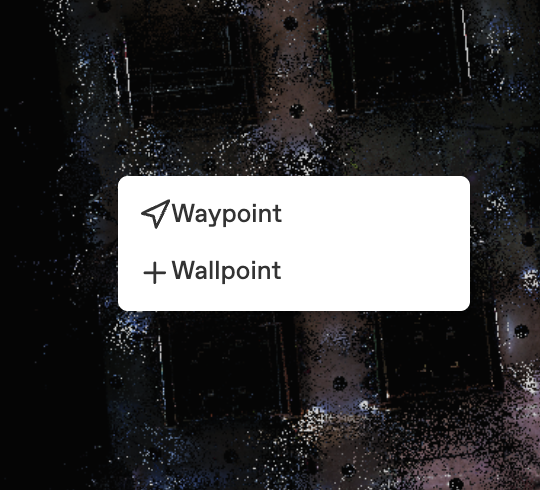
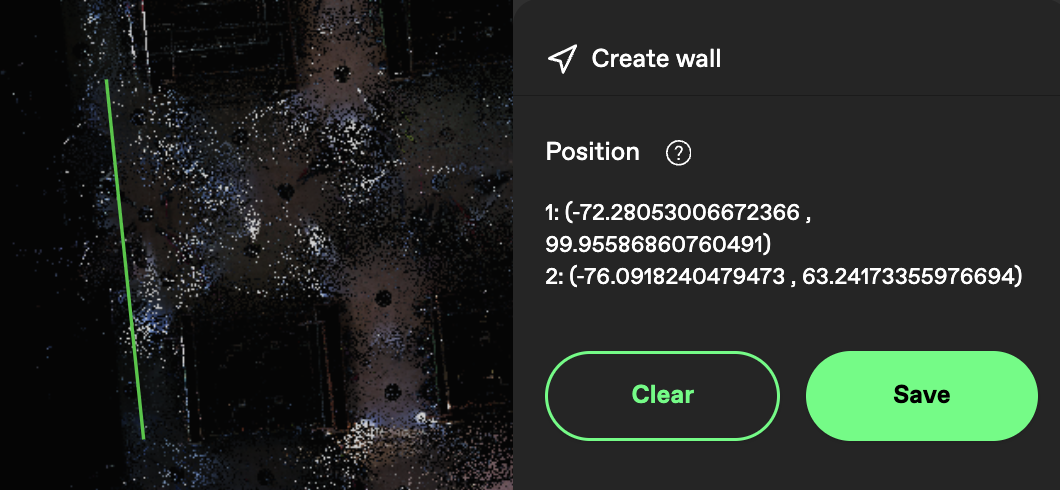
Right-click on the starting point of a wall and select "Wallpoint".
-
Move to the next point along the wall and right-click again to place another Wallpoint.
-
The points will automatically connect with lines, forming a wall.
-
Continue placing points around the perimeter or around large objects to define the space accurately.
-
You can save the walls created or delete them and start from scratch from the right panel.
If you want to mark objects, just ensure you have two lines that cross each other.
Create waypoints
Waypoints are used to define movement paths within the location for the users of the aryve Guide application. They are stops in the navigation path that help in guiding the user on a straight path, around corners or while changing floors.
Steps:
- In the Waypoint View, right-click where you want the path to start and select "Waypoint".
-
Right-click again at the next position and select another Waypoint.
-
Repeat this process to define complete navigation paths.
-
Use the right panel to connect, disconnect, or delete waypoints as needed, or change the height at which they will be displayed during navigation.
In order to connect waypoints, you can select two or more waypoint and using the side properties menu connect them either by:
-
Max distance: the maximum distance 2 waypoints should have for an edge to be added between them
-
No max distance: edges (meaning a path between two waypoints) will be created between all waypoints

Create paths
Alternatively, you can create paths that create both the waypoints and the connecting edges between them.
Steps:
- In the Waypoint View, right-click where you want the path to start and select "Path".

-
Move the line in the direction you want the path to be
-
Left-click again at the position where you want your line to stop being completely straight
-
Repeat this process to define complete navigation paths.
-
Click Save on the right side panel once your path is finalized
Portal waypoints
A waypoint can be either a crossing on the path on one floor or treated as the crossing between floors.
For the later case, a few more properties need to be set up. First of all, one would mark the waypoint as a Portal.
A Portal will then have to have a:
- Name: a system identifier and a display name
- Kind: whether the portal is a crossing to the next floor by stairs, elevator, escalator or door
- Target: what waypoint on the next floor will it connect to
- Weight: this number refers to how strong the connection between two portal waypoints is. If the number is higher, then in the case of two portal waypoints close to one another, the routing will head the user through the higher weight portal
- Continuous navigation toggle: if this is clicked, the crossing between floors will be done via continuous waypoints, alternatively an UI screen will appear on the aryve Guide app and the user will have to manually inform that they have reached the next floor
Best practices
A Portal is usually placed at the last step on one floor and at the first step on the next floor.
For example:

It is usually recommended to mark as continuous navigation portals all cases except elevators.
Please ensure you have a right height of the waypoints, weather they are displayed on a flat ground, slopes or staircases, this is better visualized in the Waypoint 3D View.
To change the height of the waypoint, you can do it for all waypoints at once by selecting them all and using the right side panel. Alternatively, select the waypoint in the Waypoint 3D View and drag it up/down.
FAQ
How to disconnect/remove a waypoint connection?
If you want to disconnect two or more waypoints, you:
-
Select the waypoints
-
Open the right side panel menu
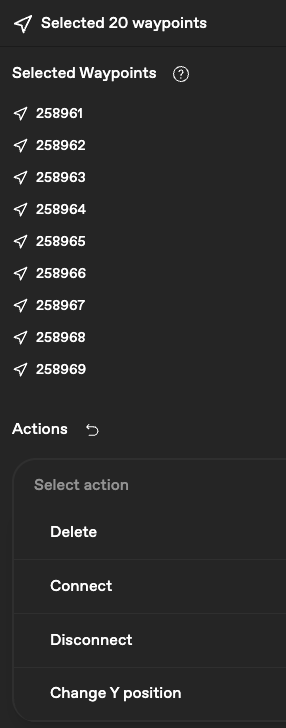
- Select Disconnect
If you want to delete the waypoints selected, then choose the Delete option in the dropdown menu.
How to change the waypoint height?
If you want to change the height of one waypoints,
-
Go to the Waypoint 3D View
-
Select the waypoint
-
Use the axes of the waypoint to move it to the desired position
How can I set the same height for all the waypoints?
If you want to change the height of multiple or all waypoints,
-
Go to the Waypoint 3D view
-
Select and move a waypoint around to a desired height
-
Check the height of the waypoint on the right side panel and copy/remember it
-
Go back to the Waypoint View
-
Select the waypoints you want to bulk modify
-
Use the right side menu and choose the action Change Y position
- Input the Y number you decided upon earlier and click Save
I do not get a route on the indoor navigation app although I set one up on aryve Studio
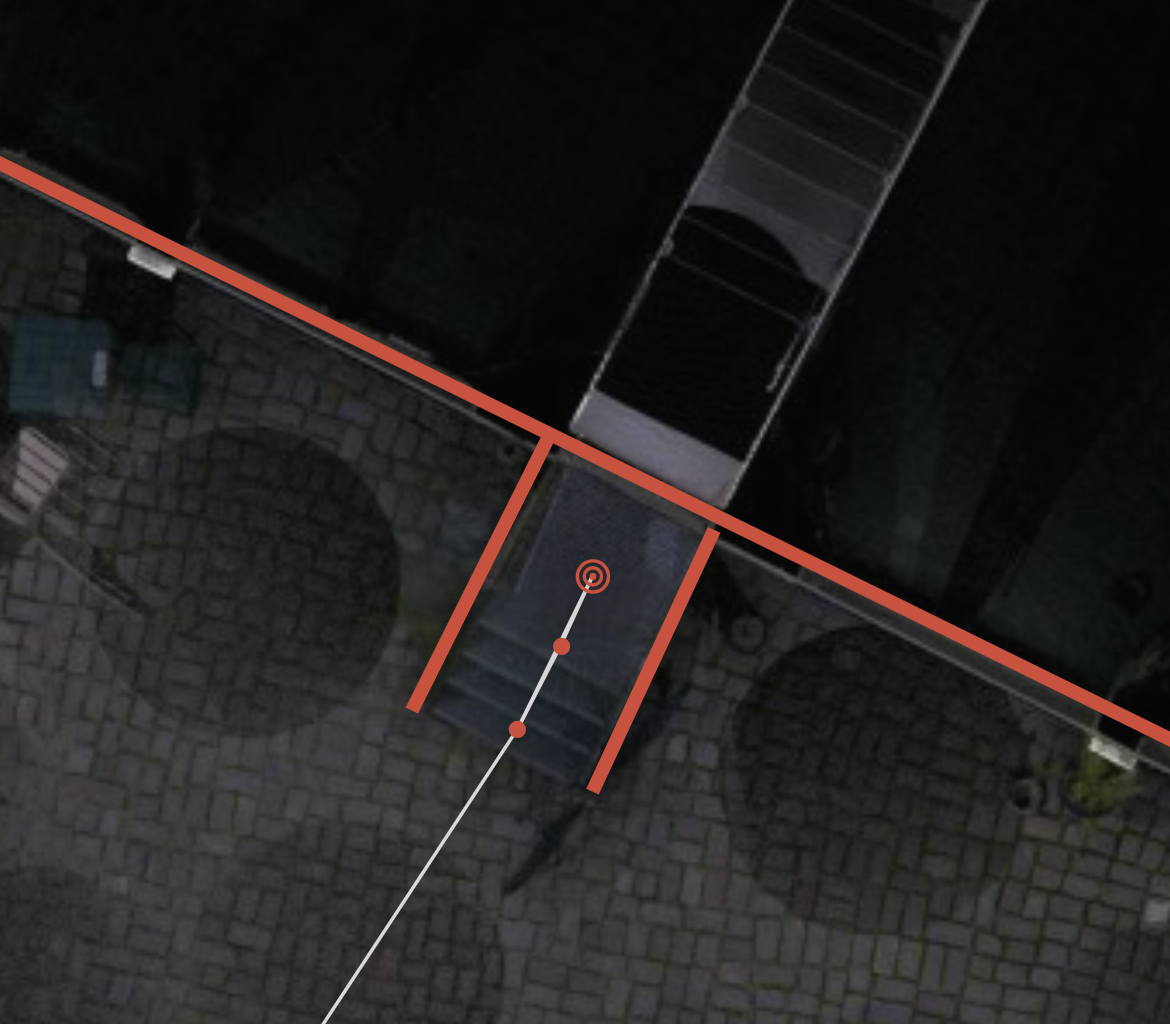
If you have set up waypoints and connected them in your location but when trying to navigate on aryve guide mobile app you do not see a route, that means you have added a closed wall area and there is no route that can go through.
In the following example, on the areas on the right if you are inside it then you cannot cross through. Correct is the example on the left where only a line (a 'wall') is enough for the system to take the user around that obstacle.
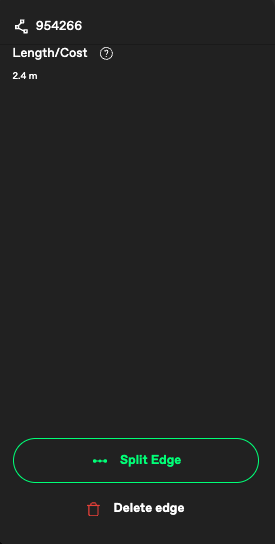
How do I remove an edge but keep the waypoints?
If you select the edge you want to remove, the right side panel will give you the option to 'Split Edge' which will therefore remove the line.